
Moka Pot Grind Size: 300–500 Microns and a 4–5 Minute Test
The ideal moka pot grind size is medium-fine, finer than what you’d use for drip coffee but noticeably coarser than espresso, with a texture close to fine beach sand. Start your grinder at a middle setting rather than the finest one, fill the basket level with no mound, and brew a single test cup. If it takes longer than five minutes or tastes bitter, go one step coarser; if it gushes out fast and tastes sour, go one step finer.
TL;DR:
- Achieving the right grind size involves aiming for fine sand-like particles between 300 and 500 microns to balance steam pressure and flow in the moka pot.
- Start with a medium-fine setting, fill the basket level without tamping, and refine the grind based on brew time and taste cues, adjusting one step at a time.
- Burr grinders outperform blade grinders by producing uniform particles that prevent over- or under-extraction, which is crucial for consistent moka brewing.
- Proper dosing requires filling the basket level without pressing or mounding the grounds, using between 8 to 30 grams depending on the pot size.
- Brewing timing and heat control are as important as grind size, with ideal extraction occurring around 4 to 5 minutes on medium heat to avoid bitterness or sourness.
Table of Contents
- What Grind Size Works Best for a Moka Pot?
- How Do You Dial In the Perfect Grind for Your Moka Pot?
- Does Grinder Type Actually Change How Your Moka Pot Tastes?
- How Much Coffee and Water Should You Use in a Moka Pot?
- What’s the Right Way to Brew and Stop a Moka Pot?
- Why Trust This Moka Pot Grind Guide?
- Why Most Grind Advice Skips the Part That Actually Matters
- Try the Espresso Blend in Your Own Moka Pot
- Sources
- FAQ
What Grind Size Works Best for a Moka Pot?
Aim for particles in the neighborhood of 300 to 500 microns. That’s roughly the texture of fine sand you’d rub between your fingers on a beach, distinctly grittier than table salt (espresso territory) but well short of the coarse, cornmeal-like grind you’d use for a French press. This [medium-fine target](https://brewmark.io/blog/moka pot-guide) sits at the center of what most moka pots need to build enough steam pressure without choking the flow.
Translating microns into a dial setting depends on your grinder, since every model calibrates its range differently. A few practical anchors:
- Entry-level electric grinders with a numbered dial: usually land in the lower third of the range, often labeled somewhere between “drip” and “espresso.”
- Hand grinders with click adjustments: typically 8 to 15 clicks from the finest setting, though this varies by brand and burr design.
- Grinders using a 1 to 30 scale (1 being espresso-fine, 30 being French press coarse): moka pot grind usually falls between 7 and 12.
None of these numbers are universal. Burr geometry, bean density, and even roast level shift where “medium-fine” actually lands on any given dial.
Pro Tip: Write down the exact setting once you find it. Every grinder drifts slightly over time as burrs wear, so what worked in January might need a half-step adjustment by summer.
Here’s a quick reference for how grind size shows up in the cup:
| Grind direction | Brew time | Taste cue |
|---|---|---|
| Too fine (near espresso) | Over 6 minutes, sputters late | Bitter, ashy, sometimes acrid |
| Correctly medium-fine | 4 to 5 minutes, steady stream | Balanced, syrupy, rounded |
| Too coarse (near drip) | Under 3 minutes, weak gurgle | Sour, watery, thin body |
That brew-time range matters more than any single number on a dial. A 4 to 5 minute total brew with a steady, unhurried stream is the clearest sign your grind and heat are working together correctly.
How Do You Dial In the Perfect Grind for Your Moka Pot?
Finding the right setting isn’t guesswork if you run one controlled test at a time. Here’s the protocol:
- Pick a starting point. Set your grinder to a middle position in the medium-fine range described above.
- Fix your dose. Fill the basket level, no mound, no pressing. Weigh it once so you can repeat it exactly.
- Control your heat. Use the same burner setting (medium, not high) for every test. Heat swings will mask what the grind is actually doing.
- Brew and time it. Start the clock the moment the pot goes on the heat. Note when liquid starts flowing and when it finishes.
- Taste and adjust. Compare against the cues below, move one click or one dial notch, and brew again. Change nothing else.
Reading the result correctly is the part most people skip. If the coffee tastes sour or sharp and the brew rushed through in under three minutes, your grind is too coarse. Go one step finer. If it tastes bitter, ashy, or the pot took forever and sputtered violently near the end, the grind is too fine. Go one step coarser. If the flow started fine but a weak, watery spurt showed up late in the pour, that’s often uneven distribution in the basket rather than grind size. Redistribute before you touch the dial.
Adjusting one variable at a time is the whole trick. A single-click change with dose and heat held constant will get you to the sweet spot for a specific bean and pot combination faster than any chart, because charts can’t account for your exact roast, your exact burner, or your exact altitude. Once you’ve found the right grind for a bean, resist the urge to also change your dose at the same time you’re testing grind. Isolate one variable, confirm it, then move to the next.
Does Grinder Type Actually Change How Your Moka Pot Tastes?
Yes, and the difference is bigger than most home brewers expect. Burr grinders produce far more uniform particle sizes than blade grinders, which matters enormously for a moka pot because uneven particles extract unevenly. Fine dust from a blade grinder over-extracts and turns bitter while larger chunks in the same batch under-extract and taste sour, so you end up drinking both problems in the same cup.

The uniformity gap is well documented. Blade grinders chop coffee somewhat randomly depending on how long you hold the button, while burr grinders crush beans between two rotating surfaces set to a consistent gap, producing a much tighter particle band. That consistency is exactly what a moka pot’s narrow “sweet window” rewards.
Within burr grinders, you’ll run into two designs:
- Flat burrs tend to deliver sharper particle uniformity, which favors precise dial-in work, though they run hotter and louder.
- Conical burrs run cooler and quieter, with slightly more particle spread, a trade-off that matters far less for moka brewing than it does for espresso.
Hand grinders deserve more credit than they usually get. A quality hand grinder with steel or ceramic burrs and precise click adjustments can match or beat a mediocre electric grinder, and it’s genuinely useful if you travel or brew moka pot coffee outside the kitchen. Look for solid click retention (no wobble between settings) and a burr set rated for espresso-range fineness, since that guarantees it can also hit medium-fine.
If your budget only stretches to one upgrade, put it toward the grinder before you touch technique. Pre-ground coffee is the biggest limiter of all: it’s usually milled for drip machines, arrives already stale from oxidation, and gives you zero ability to dial in anything.
How Much Coffee and Water Should You Use in a Moka Pot?
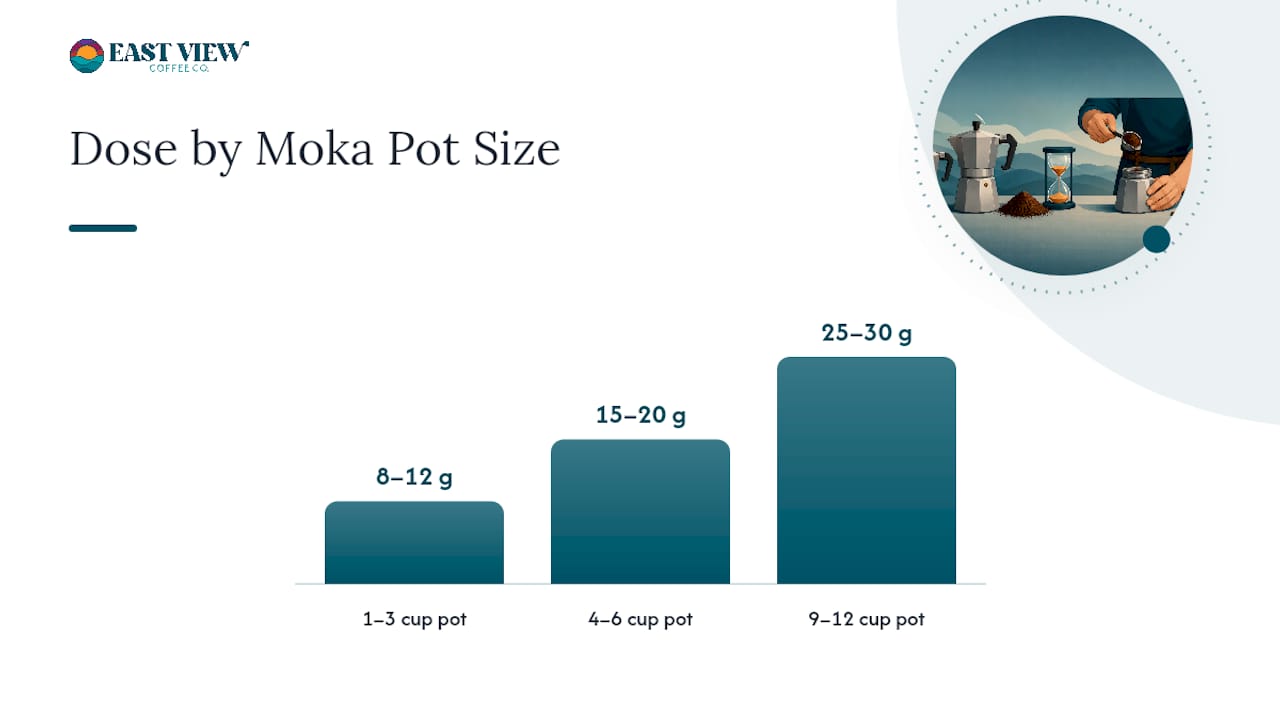
Fill the funnel basket level to the rim and sweep off any excess with a finger or the back of a knife. Don’t tap it down, don’t press it, and don’t build a mound. Manufacturer instructions are explicit on this point: Bialetti advises against pressing the grounds in the funnel, and for good reason. A moka pot builds steam pressure to push water up through the grounds, and a compacted bed creates resistance the system wasn’t designed to handle. That resistance doesn’t just ruin the flavor. It can force water through unevenly or stress the pot’s seals over repeated brews.
Rough dosing guidance by pot size:
- 1 to 3 cup pots: roughly 8 to 12 grams, filled level.
- 4 to 6 cup pots: roughly 15 to 20 grams.
- 9 to 12 cup pots: roughly 25 to 30 grams.
If your coffee tastes uneven cup to cup, even with the correct grind, check your distribution before blaming the grind size. A lopsided fill or an air pocket against the funnel wall creates a channel where water rushes through one weak spot while the rest of the bed barely gets touched, and that shows up as a confusing mix of sour and bitter in the same sip.
What’s the Right Way to Brew and Stop a Moka Pot?
Getting the timing right matters as much as getting the grind right, since even a perfect medium-fine grind can taste off if you mishandle the heat.
- Use medium heat, not high. Preheating your water slightly speeds things up without cooking the coffee before extraction even starts.
- Start your timer the moment the pot hits the burner, and watch for a steady, unbroken stream once brewing begins.
- Stop before the sputtering gets aggressive. A little gurgling near the end is normal, but a violent, spitting finish means you’re pulling in the last, bitter compounds. Pull the pot off the heat and set the base on a cool surface (a damp towel works) to halt extraction immediately.
- Adjust your stopping point by roast. Darker roasts turn bitter faster in that final stretch, so pull them slightly earlier than a lighter roast brewed the same way.
Why Trust This Moka Pot Grind Guide?
Eastviewcoffee roasts every batch in small runs out of Kenosha, Wisconsin, sourcing beans from women owned farms and building brewing guidance around how those specific roasts actually behave in a moka pot, not generic textbook numbers. That’s a meaningfully different starting point than advice built around a random supermarket blend.
If you want a bean that’s forgiving while you run the dial-in protocol above, the Espresso Blend Freshly Roasted Coffee is a reliable place to start. Its roast profile holds up well across the grind adjustments you’ll be making, so you’re isolating the variable that matters instead of fighting an unstable bean. For other brewing methods once your moka pot is dialed in, the brewing guide covers the rest of the lineup.
Why Most Grind Advice Skips the Part That Actually Matters
Most grind charts hand you a single number and call it done. That’s backwards. Two bags of coffee at the same roast level from different farms can behave differently at the identical dial setting, because density, moisture, and processing method all change how fast water moves through the grounds. A fixed number treats coffee like a manufactured product with zero variation, when it’s an agricultural one with plenty.
What actually works is the one-variable test loop: same dose, same heat, one click of adjustment, taste, repeat. It takes maybe three test brews to land somewhere good, and it works regardless of which bean, pot, or grinder you’re using, which is more than you can say for any chart. The grinder matters more than people assume, too. A cheap blade grinder will sabotage even a textbook-perfect setting because the particles it produces are inconsistent by design, not because you did the math wrong.
If there’s one thing worth prioritizing above all the numbers here, it’s this: fix your grinder quality first, then run the test loop with a bean you trust. Chasing decimal precision on a mediocre grinder is effort spent in the wrong place.
— Jenny
Try the Espresso Blend in Your Own Moka Pot
If you’re going to run the dial-in test loop, you need a bean that gives you a stable baseline instead of surprising you halfway through. Eastviewcoffee’s Espresso Blend Freshly Roasted Coffee is roasted in small batches in Kenosha specifically to hold up across grind adjustments, sourced from women owned farms that get paid a premium for the crop.
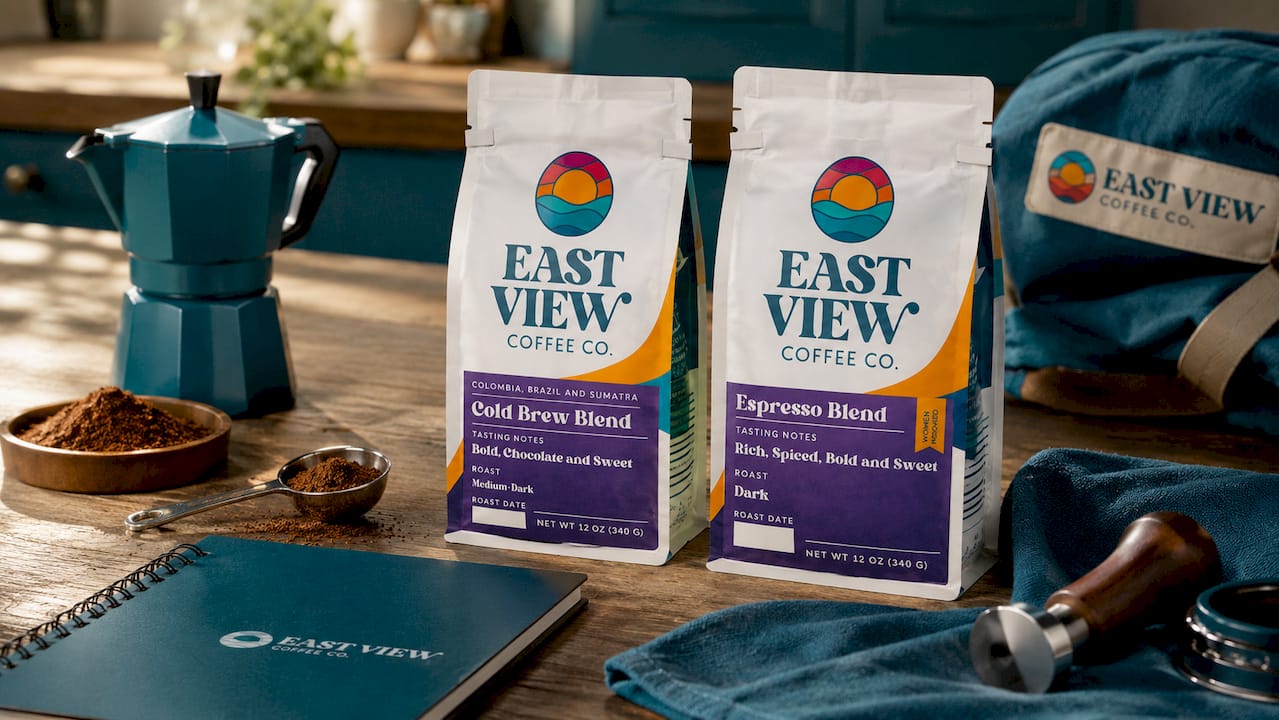
A smaller test bag is genuinely the smarter first move here. You’ll burn through several trial brews while dialing in a new grind setting, and it makes more sense to do that with a fresh, honestly sourced roast than a bulk bag of something generic. If your moka pot brewing leans more toward a lighter, brighter cup once you’ve got your grind sorted, the Cold Brew Blend Coffee is worth trying as a change of pace. Order a bag of the Espresso Blend, run the five-brew test loop from the dial-in protocol above, and you’ll have your exact setting locked in within a week.
Sources
- Moka Pot Guide: Instructions, Ratio, and Stovetop Espresso Tips | BrewMark
- Moka Pot Grind Size: The Complete Extraction Science Guide — Coffee Gear Hub
- Guide to coffee grinders — Mahlkönig
FAQ
What Grind Is Best for a Moka Pot?
Medium-fine, roughly the texture of fine sand and noticeably coarser than espresso grind, gives the most consistent extraction across most moka pot sizes.
What Happens if You Grind Too Fine for a Moka Pot?
Too-fine grounds create excessive resistance against the pot’s low brewing pressure, which slows the pour, risks sputtering, and usually produces a bitter, ashy cup.
What Ground Size Should I Use if My Coffee Tastes Sour?
A sour or watery cup with a fast brew time means the grind is too coarse; move one setting finer and keep the dose and heat unchanged for the next test.
Can I Use the Same Grind for Moka Pot and Drip Coffee?
No. Drip coffee needs a coarser grind than moka pots, since drip machines rely on gravity alone while moka pots build steam pressure that needs a tighter grind to extract properly.
Do I Need a Burr Grinder for a Moka Pot, or Will a Blade Grinder Work?
A burr grinder is strongly recommended because it produces far more uniform particles than a blade grinder, and that uniformity is what keeps moka extraction balanced instead of a mix of over and under extracted grounds.